Tillv. artnr. 5400
ESP32 FEATHER V2 STEMMA QT
Adafruit Industries LLC
License: See Original Project Adafruit Feather
Courtesy of Adafruit
Guide by Erin St Blaine
Overview
Welcome, Traveler. How might I help you?
Adventurers, friends, and companions will feel welcome in your space when they see this custom glowing tavern sign, lit from inside with a fiery glow. Program different animation modes to suit your mood with just a few taps on your phone or control the colors and animations with an infrared remote. This project will transform your home bar or game room into a delightful warm refuge for weary travelers. Tankards not included.
Difficulty
This is an intermediate level project. Skills needed:
Materials
The ESP32 Feather V2 is a powerful board that works seamlessly with the free WLED software. It can be powered with a battery through the JST port or with a USB cable directly through the onboard USB-C port. You'll need a USB-C cable to program it as well.
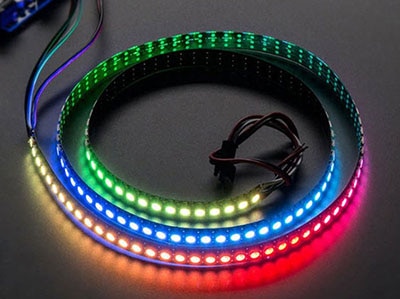
For lights, this project uses mini-skinny NeoPixels. These are available in several different densities, so there are a few options. For my sign I used the medium density 60/m pixels. This project could also be done with 30/m NeoPixels or the super-high density 144/m NeoPixels for extra buttery-smooth animation.
Adding infrared control is simple in WLED, so I wired up an IR sensor to my Feather. This makes it easy to turn the sign on and off or choose animation modes without needing to go find my phone.
WLED software will work with a wide variety of different remotes. For this tutorial I'm using this 44-key remote from Amazon.
Additional Tools & Materials
Wiring Diagram
With the bump on the IR sensor facing you, connect as follows:
From the IN end on the NeoPixel strip, connect as follows:
WLED Software
Install WLED
These next steps require a WebSerial-compatible browser. As of this writing, that means Google Chrome, Microsoft Edge or Opera “desktop” browsers. Other browsers (Safari, Firefox, Explorer, and anything mobile) won’t work.
Visit https://install.wled.me/
Plug your microcontroller into your computer with a known good USB cable. Click "Install" and select the port for your board.
Depending on the USB-to-serial bridge chip on the board, you might see one or two serial ports. On Mac, for instance, there might be both “/dev/cu.usbmodem[number]” and “/dev/cu.wchusbserial[number]”. Use the “wchusbserial” one.
After successful installation, enter your WiFi network name and password when prompted. This must be a 2.4 GHz WiFi network; ESP32 does not support 5 GHz networks. If it can’t connect, then as a fallback WLED will create its own 2.4 GHz WiFi access point.
Setup & Preferences
WiFi Setup
It's a good idea to head to WiFi Setup screen and create a good URL so you can control your project from any web-enabled device. I called mine http://tavernsign.local -- this is what I type into any web browser on my WiFi network in order to connect to my project.
LED Preferences
You need to change just a couple of settings in the app to get the lights running correctly. Click the LED Preferences tab and scroll down to Hardware Setup. Enter the total number of LEDs in your strip under "Length".
The NeoPixel data pin is connected to pin 13 on the Feather, so make GPIO match that pin number. Also, change the IR GPIO pin to 12, which corresponds to the pin soldered to the IR sensor, and select the remote you're using from the list.
Use It
Now you can use any computer or handheld device to control your LEDs.
Make sure your device is on the same WiFi network as your board. Navigate to your custom URL (http://tavernsign.local/ for me) in a web browser. You'll see a color picker above a whole bunch of color palette choices.
Choose a color, choose an effect, and watch your lights animate and glow!
Usage
Save your favorite combinations as presets, create playlists, control the speed and intensity of the animations, and lots more. This web app is incredibly intuitive and easy to use.
When you're in "solid" mode in WLED, the color buttons near the top of the remote will change the colors, making the pixels act like a "dumb" RGB strip.
On my 44-key remote, there are buttons near the bottom labeled "DIY1", "DIY2" etc. WLED will automatically assign your animation presets to these buttons so you can select your favorite presets or playlists. Simply save the presets you want to the first 6 preset slots and the buttons will pull them up.
You will need to press the button marked "Auto" to switch to DIY mode on the remote. Press "Auto" then "DIY1" to play the preset saved to slot #1 in WLED.
Head over to the WLED wiki at https://kno.wled.ge/ to delve into all the particulars.
Electronics Assembly
IR Sensor
Trim the sensor legs about halfway down.
With the sensor bump facing you and the legs pointing down, slip a red wire onto the leg on the right, a black wire to the middle leg, and a yellow wire to the leg on the left.
Cover the connections with heat shrink so they don't short out.
Solder to the Feather as follows:
Leave the black (G) wire unconnected for now.
NeoPixels
To give a little more flexibility for placement, I soldered around 8" of wire onto the NeoPixel strip. This will give me some options about where to place the Feather board and IR sensor inside the sign.
Strip the 4th wire from the ribbon cable. Find the "in" end of the strip (labeled DI usually) and solder the striped wire to red (or the +5v pad), the middle wire to white (or the DI pad), and the remaining wire to black (or the G pad).
Feather
Connect the other end of the ribbon cable to the Feather as follows:
You're left with two black wires - one from the IR sensor and one from the NeoPixel strip, which both need to connect to the G pin on the Feather. The easiest way to do this is to splice the two wires together with a third wire, then connect this wire to the G pin on the Feather.
Plug your Feather in to power. If all goes well, your lights will come on in a solid yellow.
Grab your 44-key remote and press some buttons to see if it responds.
Troubleshooting
If the lights don't come on, or the remote doesn't seem to do anything, here are a couple things to try:
Build the Sign
Wood Sign
I wanted my sign to look old and weathered, so I started with some old redwood fence boards, carefully harvesting them from a derelict fence.
I trimmed them to the size and shape I wanted on a table saw, then ran them through a planer to get them to an even thickness. The laser cutter I wanted to use has a maximum depth of 1/4", so I planed them to 1/4".
My sign is 18" long by around 11" tall. I made two panels of this size and held them together with painter's tape, and printed out a mockup of my lettering so I could get a good idea of the sizing.
Then I took them to my local maker space for laser cutting. I'd emailed over a vector file of my font design ahead of time, and they were all ready to cut it for me when I arrived. The cutting took about 15 minutes per side.
Having tape on the back of the boards made it much easier to keep track of all the pieces, like the cutouts inside the "B" and "A", which will need to be glued back in later on.
I cut two panels and did a mirror-image of the text on the back panel. The sign reads backwards from the back, but this way the light passes all the way through the acrylic from either side.
Acrylic Panel
I used 1/4" acrylic since that is almost the same thickness as the NeoPixel strip. But what type is best? There's a product available from Tap Plastics called Chemcast Edgelit Acrylic, which is around $20/sf. I already had piece of 1/4 extruded acrylic on-hand, which is a bit cheaper at around $15/sf, so I did a side-by-side comparison to see if the Chemcast was worth the price.
Conclusion? I couldn't tell the difference between the regular acrylic and the fancy Chemcast version, so I'd recommend going with the cheaper / easier to find variety.
If you're building an indoor sign like I am, it's easiest to attach the LED strip with clear packing tape. Not much sticks to the silicone sheath but packing tape holds them firmly and invisibly. I wouldn't use it in an outdoor setting -- better to use Devcon Silicone Glue if you need something weather-proof -- but the glue is messy and hard to use, and the packing tape goes on in seconds.
In order for the whole surface to glow, we need to rough the acrylic up a bit. I tried a variety of different grits of sandpaper and found that the rougher I made the surface, the brighter the glow. 220 grit sandpaper seemed to work really well without leaving a lot of visible individual scratches. Sand both sides for maximum glow.
Assembly
I sandwiched the acrylic panel between the two sides, leaving room at the top for the microcontroller and IR sensor. I placed the sensor near the top of the sign so it could stick out a bit and be easily picked up by the remote control.
I ended up hanging the sign really high in the air, and if I were to do this again, I'd put the IR sensor on the bottom edge instead. Having it on the top makes it a little hard to reach with the remote.
I added narrow chopstick-shaped pieces of fence board around the edges of the acrylic panel, to block the light, and tacked in a couple of blocks near the top for more structure behind the hanging hardware. I tacked everything together with wood glue and finishing nails.
I plugged the USB cable into the Feather before nailing everything together. This design does not easily allow access to the Feather, but as long as the USB cable is in place, I can reprogram it if needed.
I finished it off with a hand-turned signpost and 45-degree crossbar for bracing and added a recessed lag bolt from the back of the mounting board into the post for added stability.
I used knotted jute rope to hang the sign from the post and threaded the USB cable up through the rope knots and through a hole in the signpost, where it hides inside a narrow channel cut into the top of the post on the table saw.